> ## Documentation Index
> Fetch the complete documentation index at: https://gcore.com/docs/llms.txt
> Use this file to discover all available pages before exploring further.
# Integrate CDN resource with SocialEngine
Before you take any steps please back up your files and database. The plugin works only with default CMS pattern. If you manually changed CMS patterns, the plugin might not help you.
Log into your SocialEngine admin panel.
Go to Settings/General Settings.
Enter your CNAME from the [Gcore Customer Portal](https://portal.gcore.com/cdn/resources/list).
Ensure that your [CNAME record has been configured](/cdn/cdn-resource-options/general/create-and-set-a-custom-domain-for-the-content-delivery-via-cdn) in a proper way before using it for integration.
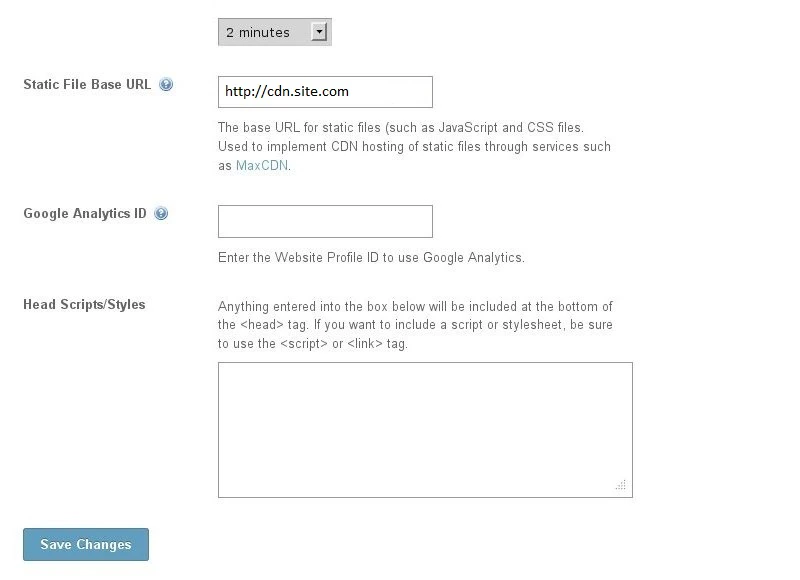 Click **Save Changes** button at the bottom of the page.
Integration has been completed! We highly recommend you to check the HTML code of your web page to ensure that URLs have been rewritten properly from your original ones to CNAME from the Gcore Customer Portal.
To do that press **F12** or open Developers Tools in your browser, choose the Network tab and refresh the page. All static files should have your CNAME in URLs.
Click **Save Changes** button at the bottom of the page.
Integration has been completed! We highly recommend you to check the HTML code of your web page to ensure that URLs have been rewritten properly from your original ones to CNAME from the Gcore Customer Portal.
To do that press **F12** or open Developers Tools in your browser, choose the Network tab and refresh the page. All static files should have your CNAME in URLs.