> ## Documentation Index
> Fetch the complete documentation index at: https://gcore.com/docs/llms.txt
> Use this file to discover all available pages before exploring further.
# About autoscaling
Autoscaling adjusts the number of nodes in a pool based on changes in load. If the existing nodes cannot handle the load, a new one is deployed. If some nodes are idle without any load, they are removed.
## Autoscaling behavior
Autoscaling keeps the node count between the configured minimum and maximum. It never creates more nodes than the maximum or removes nodes below the minimum.
* If a new pod needs to run and the existing nodes do not have enough resources, autoscaling deploys a new node. Available resources are determined by `resources.requests`.
* If some nodes run without any pods for 20 minutes, autoscaling removes them.
* If nodes with running pods are manually deleted, reducing the count below the autoscaling minimum, the system reassesses the pool load after 20 minutes. If the remaining nodes cannot handle the required pods, more nodes are added; otherwise, the count stays as-is.
## Autoscaling settings
To update the minimum and maximum node count for an existing pool:
1\. In the [Gcore Customer Portal](https://portal.gcore.com), navigate to **Cloud** > **Managed Kubernetes**, then click the cluster name.
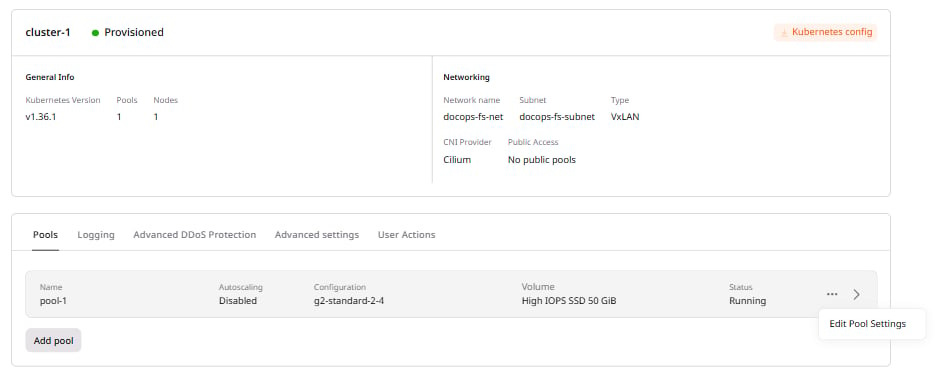
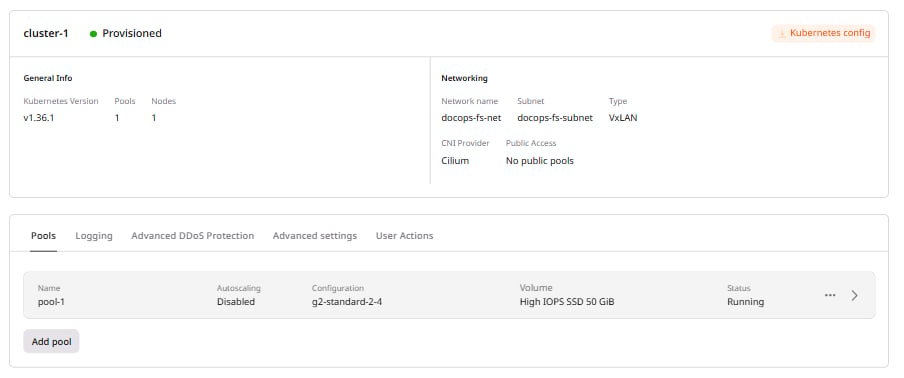 2\. Open the **Pools** section, click **⋯** next to the pool, and select **Edit Pool Settings**.
 3\. Enter the maximum and minimum number of nodes and click **Save**.
The new autoscaling settings are applied.
## Disable autoscaling
There is no separate toggle for autoscaling. To disable it, set the minimum and maximum node counts to the same value — autoscaling becomes inactive when there is no range for it to act on.
1\. In the Customer Portal, navigate to **Cloud** > **Managed Kubernetes**, then click the cluster name.
2\. Open the **Pools** section, click **⋯** next to the pool, and select **Edit Pool Settings**.
3\. Set the minimum and maximum node counts to the same value and click **Save**.
Autoscaling is now disabled. The pool maintains the specified node count regardless of load.
3\. Enter the maximum and minimum number of nodes and click **Save**.
The new autoscaling settings are applied.
## Disable autoscaling
There is no separate toggle for autoscaling. To disable it, set the minimum and maximum node counts to the same value — autoscaling becomes inactive when there is no range for it to act on.
1\. In the Customer Portal, navigate to **Cloud** > **Managed Kubernetes**, then click the cluster name.
2\. Open the **Pools** section, click **⋯** next to the pool, and select **Edit Pool Settings**.
3\. Set the minimum and maximum node counts to the same value and click **Save**.
Autoscaling is now disabled. The pool maintains the specified node count regardless of load.