

Configure SSO in the Admin Portal
Connecting an identity provider requires enabling SSO login, then filling in the provider’s connection details.1
Enable SSO login
- Navigate to the Security settings.
- Click Authorization.
- Enable the SSO login toggle.
2
Configure the provider
In the Provider section that appears: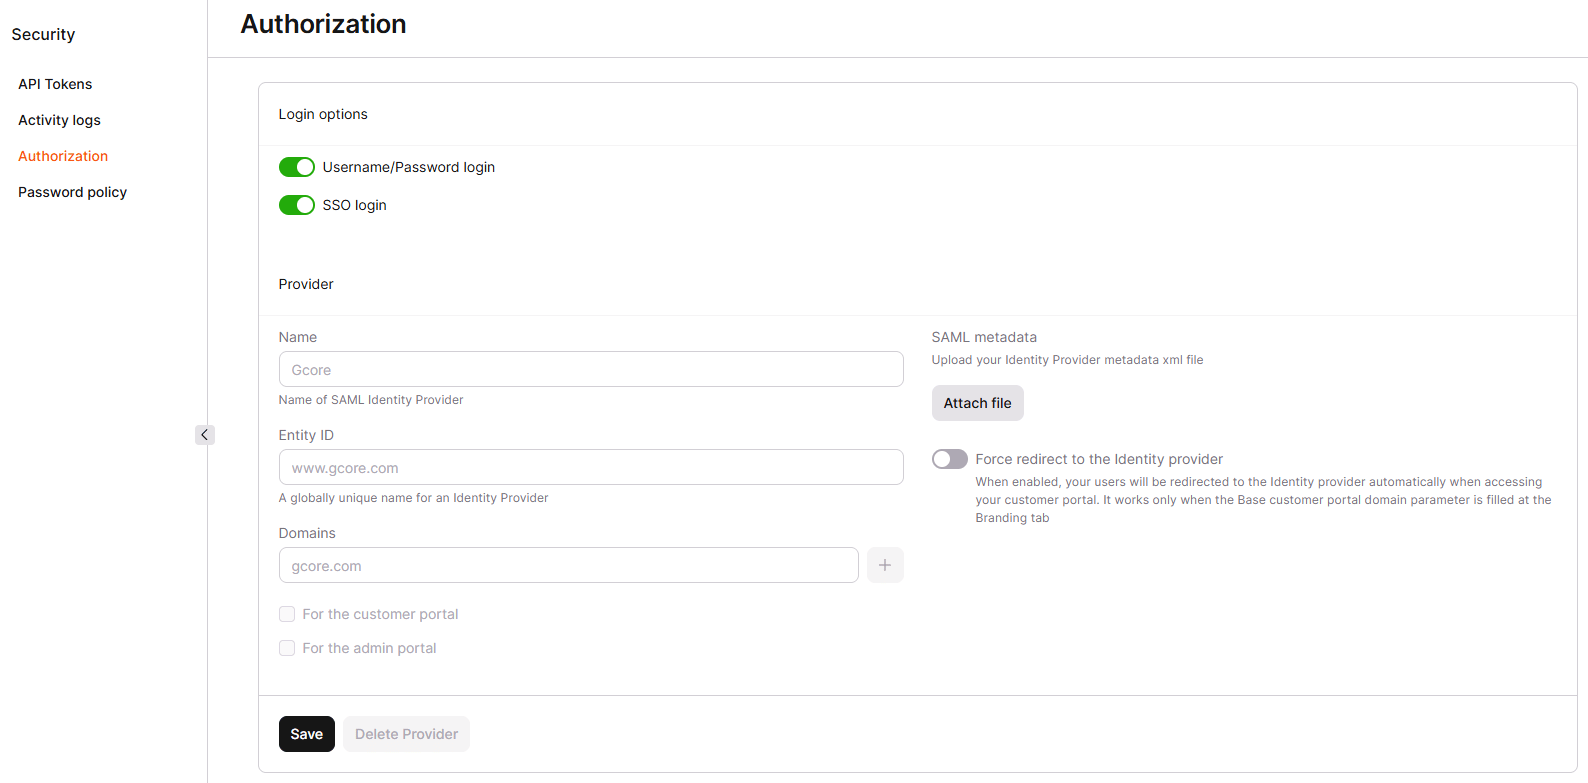
- In the Name field, enter any identifier for the identity provider; this value only appears in the Admin Portal and doesn’t affect the SSO connection.
- In the Entity ID field, enter the globally unique identifier for the identity provider, provided by the IdP.
- In the Domains field, enter the corporate domains that redirect to the identity provider for SSO authorization.
- Under SAML metadata, click Attach file and upload the identity provider’s metadata XML file, provided by the IdP.
- Select For the customer portal, For the admin portal, or both, depending on which accounts can use SSO.
- Click Save.
Add Gcore metadata to the identity provider
Configuring the Admin Portal side is only half the connection, since the identity provider also needs the Gcore side’s metadata. All the necessary metadata is available athttps://api.gcore.com/iam/auth/saml2/metadata. Identity providers using a self-signed SSL certificate need this option enabled in their own settings.
Sign in with SSO
Once SSO is configured, a Sign in with SAML SSO link appears on the sign-in page for both the Customer Portal and the Admin Portal.

Support IdP-initiated login
Gcore’s SAML implementation primarily supports service provider (SP)-initiated login, but identity provider (IdP)-initiated login also works with the right configuration:- Configure the identity provider to redirect login requests to the Gcore service provider endpoint
auth.gcore.com, or the reseller’s custom domain if one is set, likeauth.example.com. - Verify SSO login is active with a provider configured, as covered above, and enable Force redirect to the Identity provider for automatic redirection.
- Configure the identity provider to require SP-initiated login, so a user starting from the IdP is redirected to the Gcore sign-in URL first.
- Confirm the flow end to end:
a. The user starts at the identity provider.
b. The identity provider redirects the request to
auth.gcore.comor the custom domain. c. The user is redirected back to the identity provider for authentication. d. After successful authentication, the user lands in the Customer Portal with the correct domain settings applied.