

Origin group overview
One origin group can contain a single website, private bucket, or FastEdge HTTP application, or multiple origins. With multiple active origins, the CDN distributes requests using a round-robin algorithm. Failover and retry behavior — including when to activate backup origins and which failure conditions trigger a retry — depend on origin roles and the Use next upstream option. See Available options for details.Origin group configuration
Add one or more origins to the group. For URL and S3 origins, Host header override is optional; when left empty, the CDN uses the Host header value from the CDN resource settings.S3 storage
Select Amazon for Amazon S3 or Other for another S3-compatible storage service.Amazon S3 storage
Amazon S3 requires an access key ID and secret access key; the AWS guide explains where to find both values.1
Select Amazon S3
Select S3 storage, then select Amazon.
2
Configure the bucket
Enter the storage details: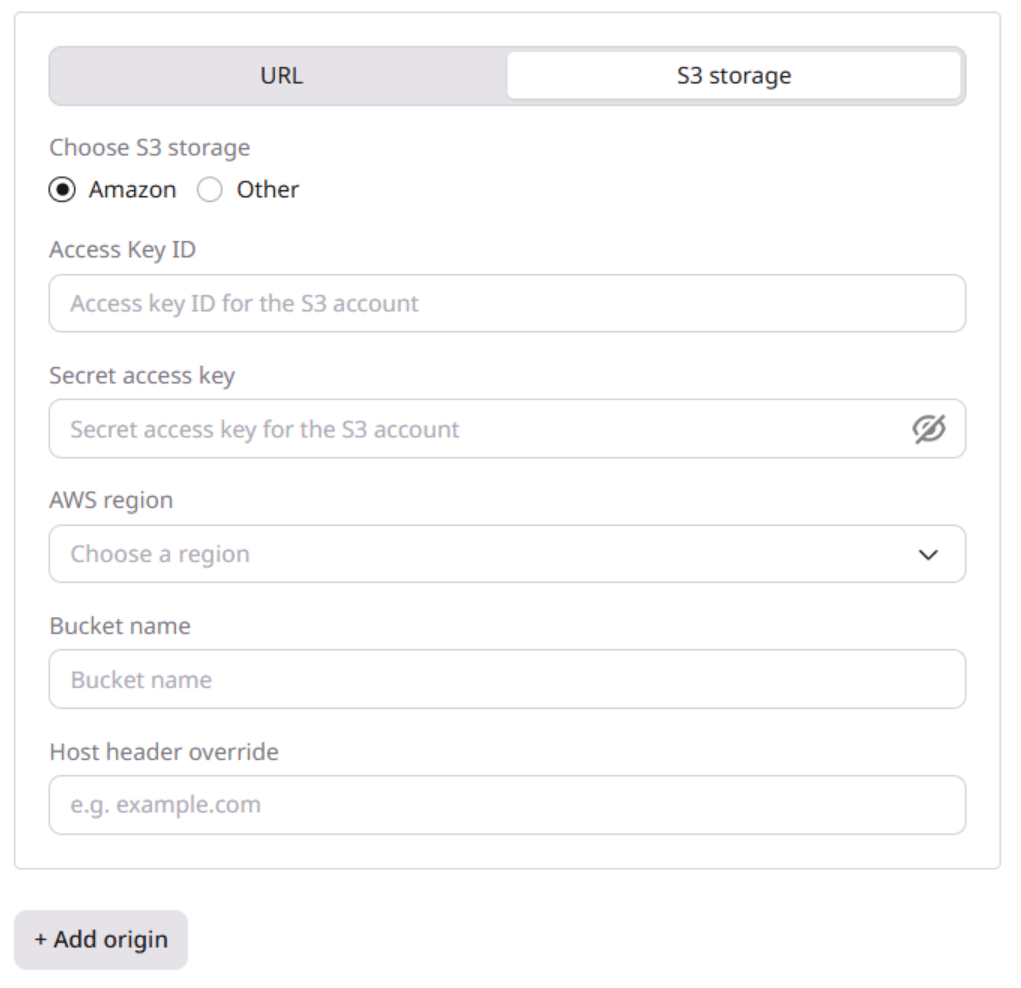
- Enter the Access Key ID.
- Enter the Secret access key.
- Select the AWS region where the bucket is hosted.
- Enter the Bucket name.
- (Optional) Enter the Host header override.
Other S3 storage
For Gcore Object Storage, select Other, copy the storage hostname from Details, and create the required credentials under Access keys.1
Select another S3 service
Select S3 storage, then select Other.
2
Configure the bucket
Enter the storage details: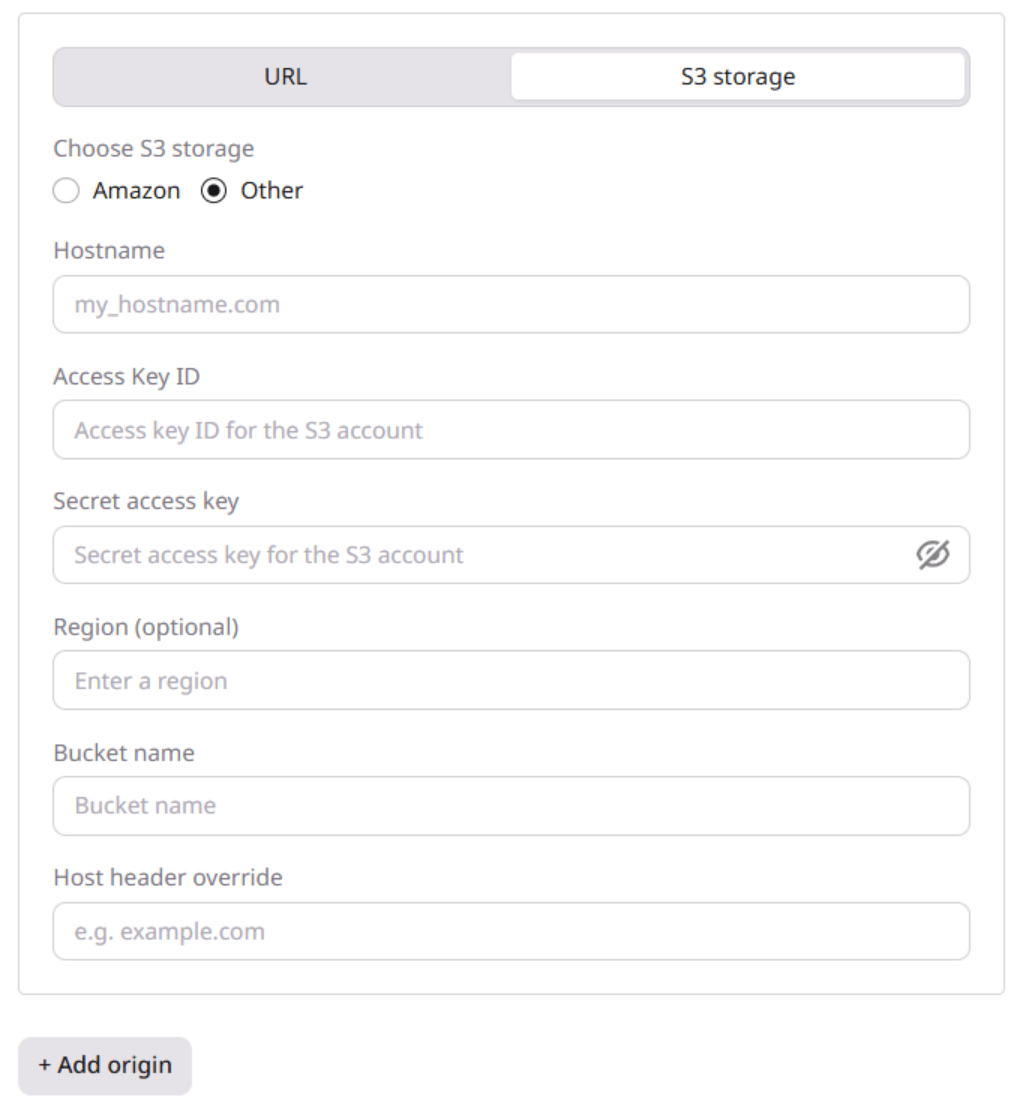
- Enter the storage server Hostname.
- Enter the Access Key ID.
- Enter the Secret access key.
- Enter the Region (optional) where the bucket is hosted.
- Enter the Bucket name.
- (Optional) Enter the Host header override.
URL origin
Use a URL origin for a website or IP address that does not require S3 authentication.1
Select the origin type
Select URL.
2
Configure the origin
Enter the origin details: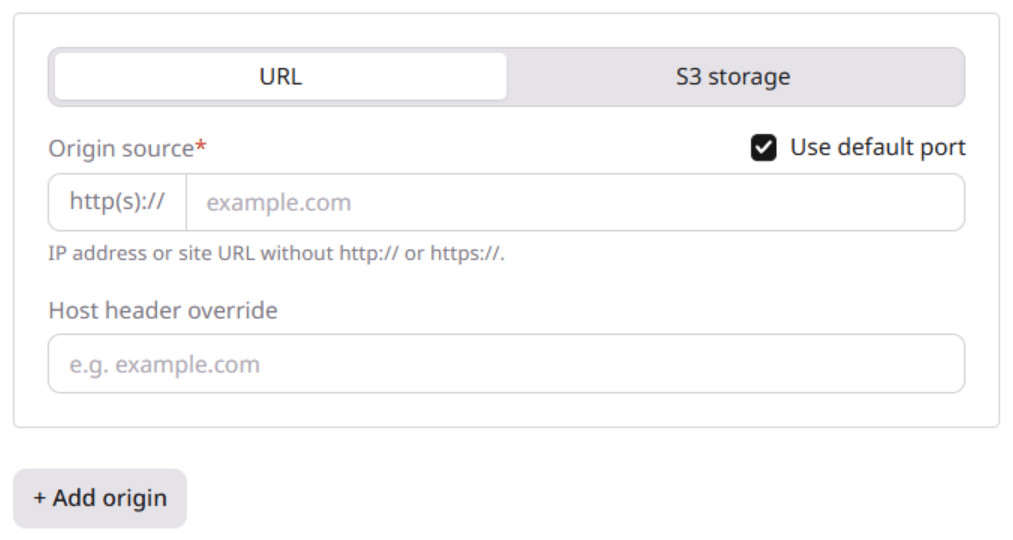
- In Origin source, enter the IP address or domain name without
http://orhttps://. - (Optional) Enter the Host header override.
- (Optional) For ports other than 80 or 443, disable Use default port and enter the port.
3
Add more origins
(Optional) Click + Add origin and enter another source. The CDN distributes requests across active origins using a round-robin algorithm.
FastEdge HTTP application
A FastEdge HTTP application can serve as a native CDN origin. Requests reach the application directly on the same edge node, which avoids duplicate response headers, preserves client GeoIP data, and reduces latency.Because the FastEdge application runs on the same edge node as the CDN, the upstream address in CDN logs and metrics can appear as that node’s IP rather than a remote origin address. This applies only when the origin type is a FastEdge HTTP application, not when a FastEdge hook is attached to a regular CDN origin.
1
Select the origin type
Select FastEdge.
2
Select the application
In the FastEdge application dropdown, select the HTTP application.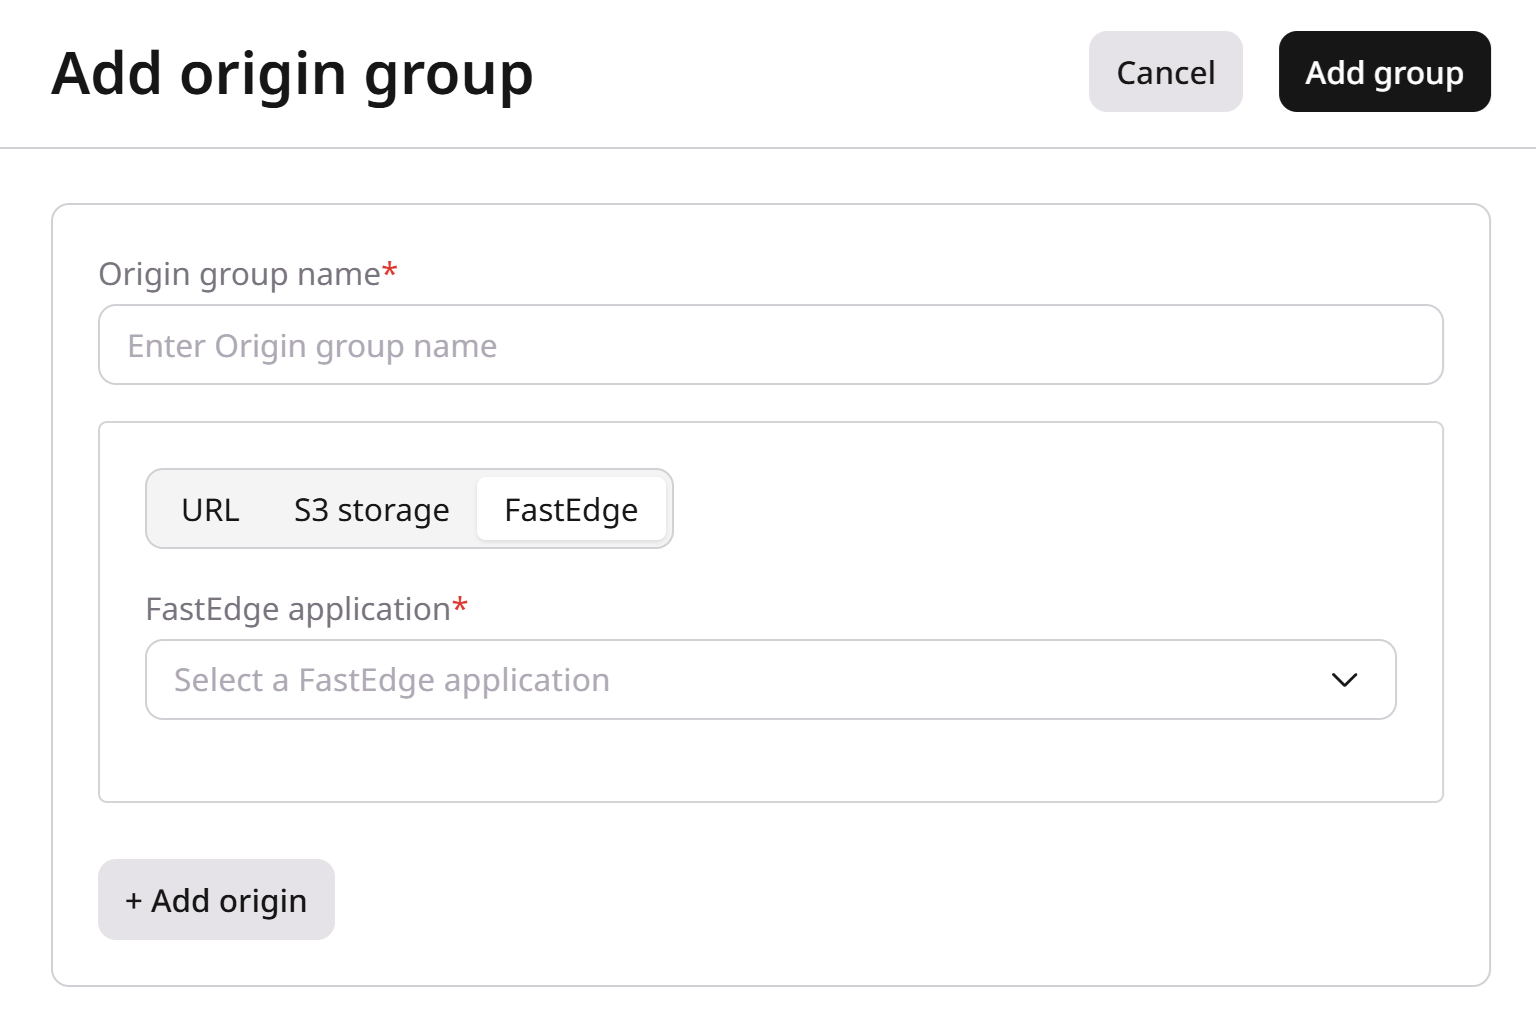
Available options
Multiple-origin configuration
For groups with multiple origins, configure their availability, roles, and failover behavior:- Enable or disable each origin.
- Assign active and backup origins.
- Enable or disable Use next upstream.
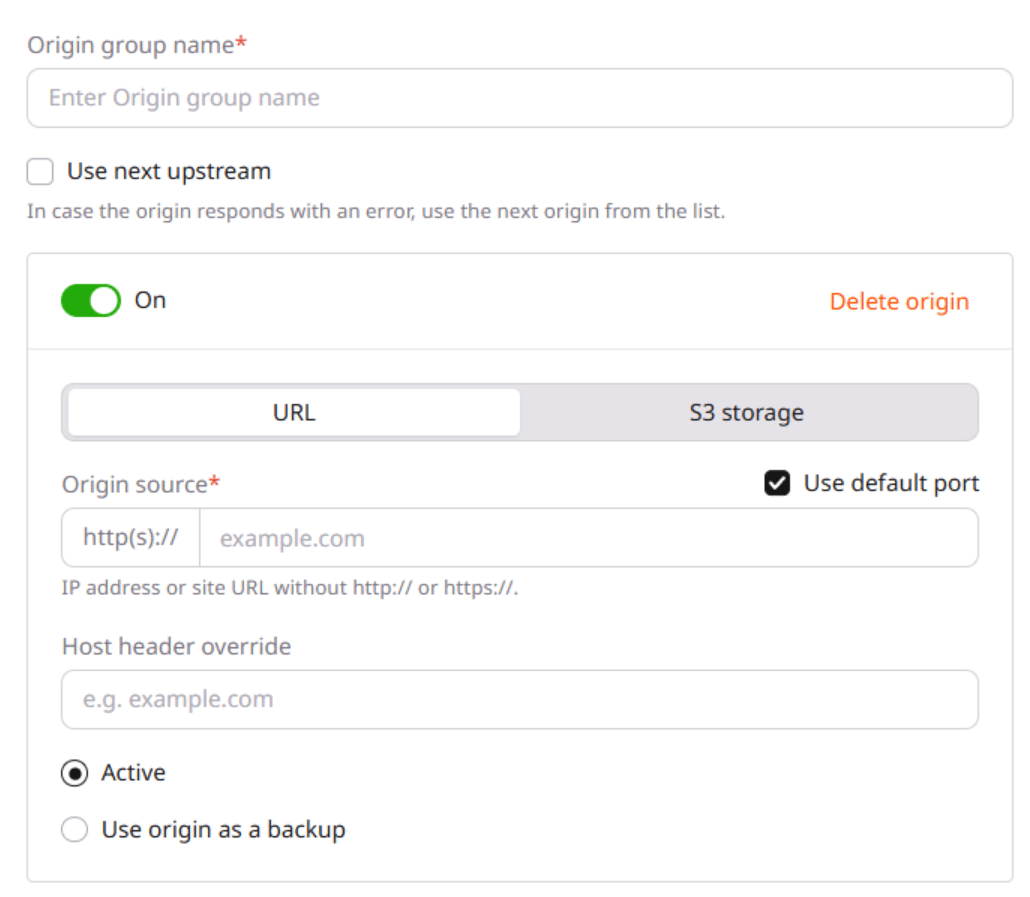
Origin availability
Each origin has the On toggle enabled by default, so the CDN can pull content from it. Disable the toggle to remove the origin from this group’s load balancing; requests stop reaching it within 15 minutes.At least one active origin must remain enabled.
Active and backup origins
New origins receive the Active status by default and participate in round-robin load balancing. Select Use origin as a backup to remove an origin from regular balancing and use it when the active origins meet the applicable failover conditions.Use next upstream
Enable Use next upstream only when every origin contains the exact same content. When enabled via the Customer Portal, the CDN retries the request on the next available origin after connection errors or timeouts. Additional retry conditions — such as specific HTTP response codes — can be configured through the Create origin group API using theproxy_next_upstream array. If no origin is available, the CDN serves the last origin’s response.
The resulting request behavior depends on the origin roles and option state:
Origin group creation
Origin groups can be created directly from CDN resource settings or from the Origin groups page.From resource settings
1
Open the resource settings
In the Gcore Customer Portal, navigate to CDN, find the resource, and click its CNAME.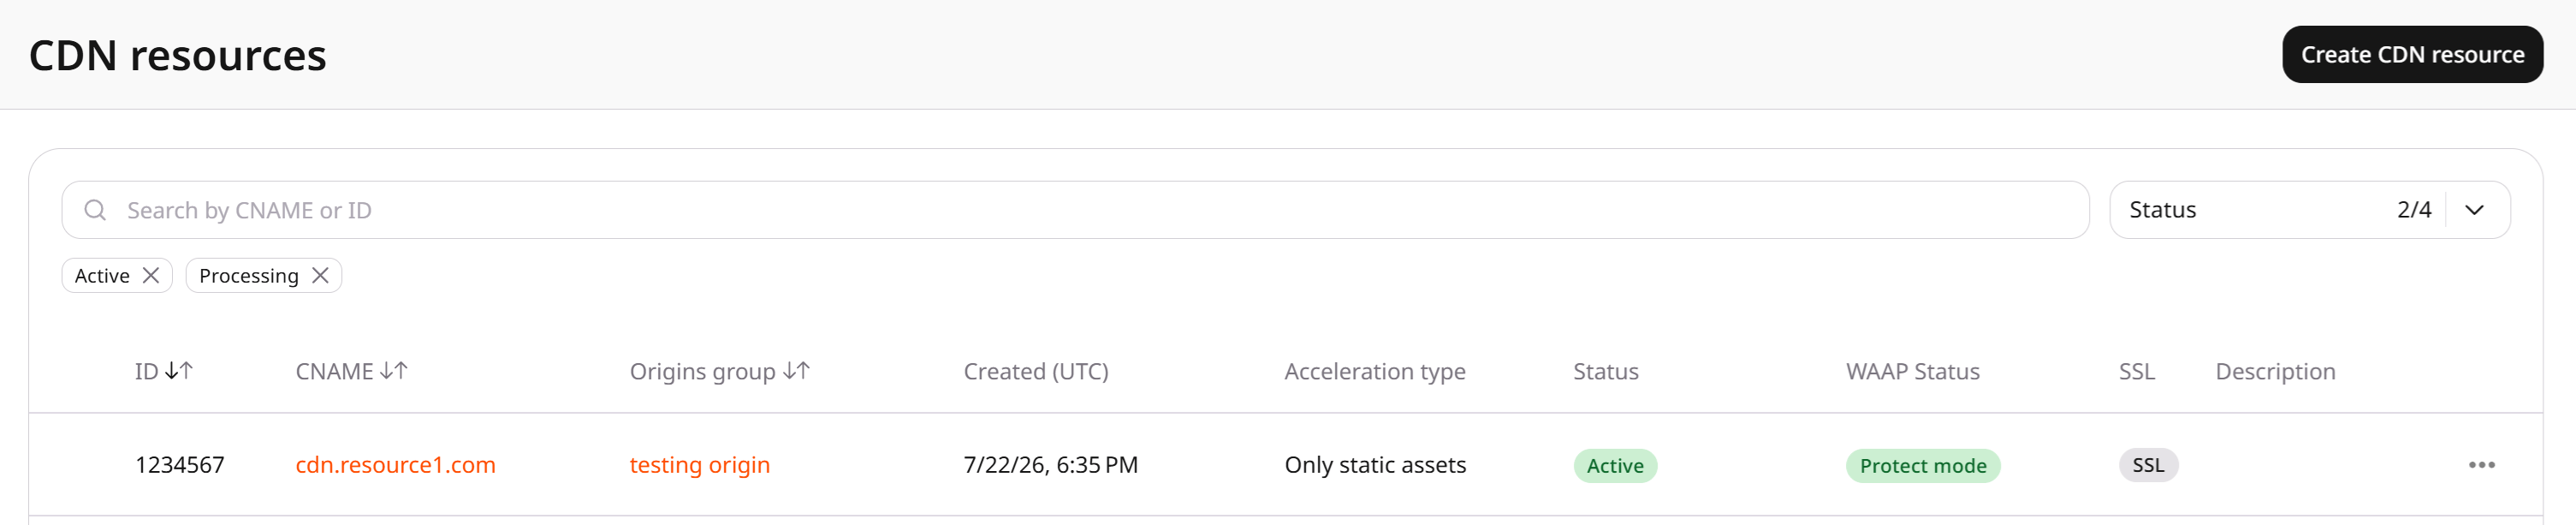
2
Open the origin group form
In the Pull content from section, click Add group.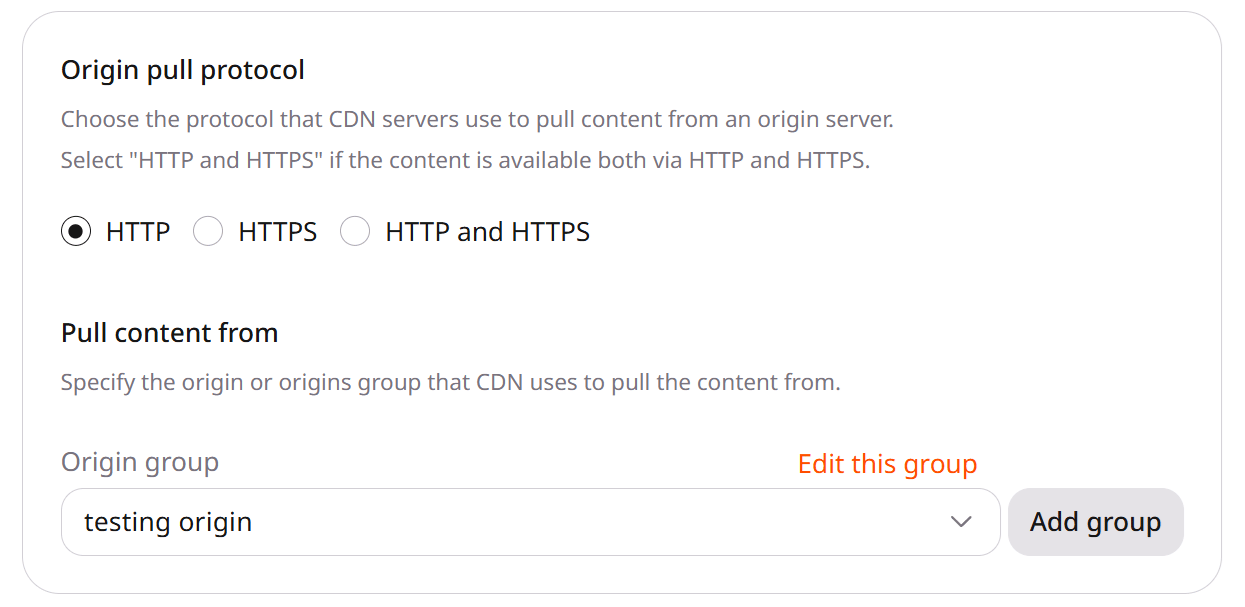
3
Enter the origin group name
Enter a unique Origin group name.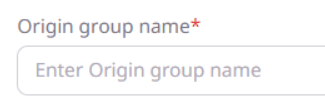
4
Configure the origin group
Select the origin type and configure it as described in Origin group configuration.
5
Save the origin group
Click Add group.
6
Save the CDN resource
Click Save changes.
From the Origin groups page
Groups created on the Origin groups page must be attached to a CDN resource after creation. See Origin group attachment.1
Open the origin groups page
In the Customer Portal, navigate to CDN > Origin groups.
2
Open the creation form
Click Add origin group.
3
Enter the origin group name
Enter a unique Origin group name.
4
Configure the origin group
Select the origin type and configure it as described in Origin group configuration.
5
Save the origin group
Click Add group.
Origin group attachment
Changing a resource’s origin group does not update its Host header. Update the Host header separately.
1
Open the resource settings
In the Customer Portal, navigate to CDN, find the resource, and click its CNAME.
2
Select the origin group
In the Pull content from section, select the group from the Origin group dropdown and click Add group.
3
Save the resource
Click Save changes.