

The domain must already be delegated to Gcore name servers — the Getting started guide covers zone creation and delegation.
Step 1. Set up an A record
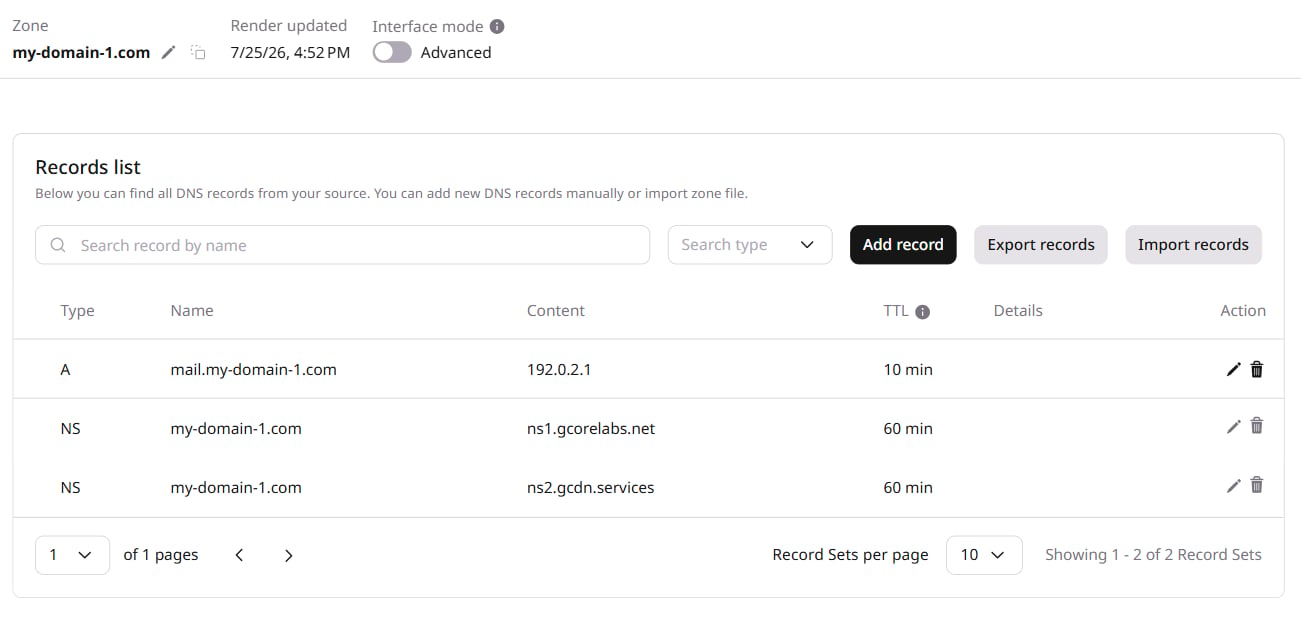
An A record maps a subdomain to an IP address — for a mail server at192.0.2.1, the record for mail.sample-test.com looks like this:
Step 2. Set up an MX record
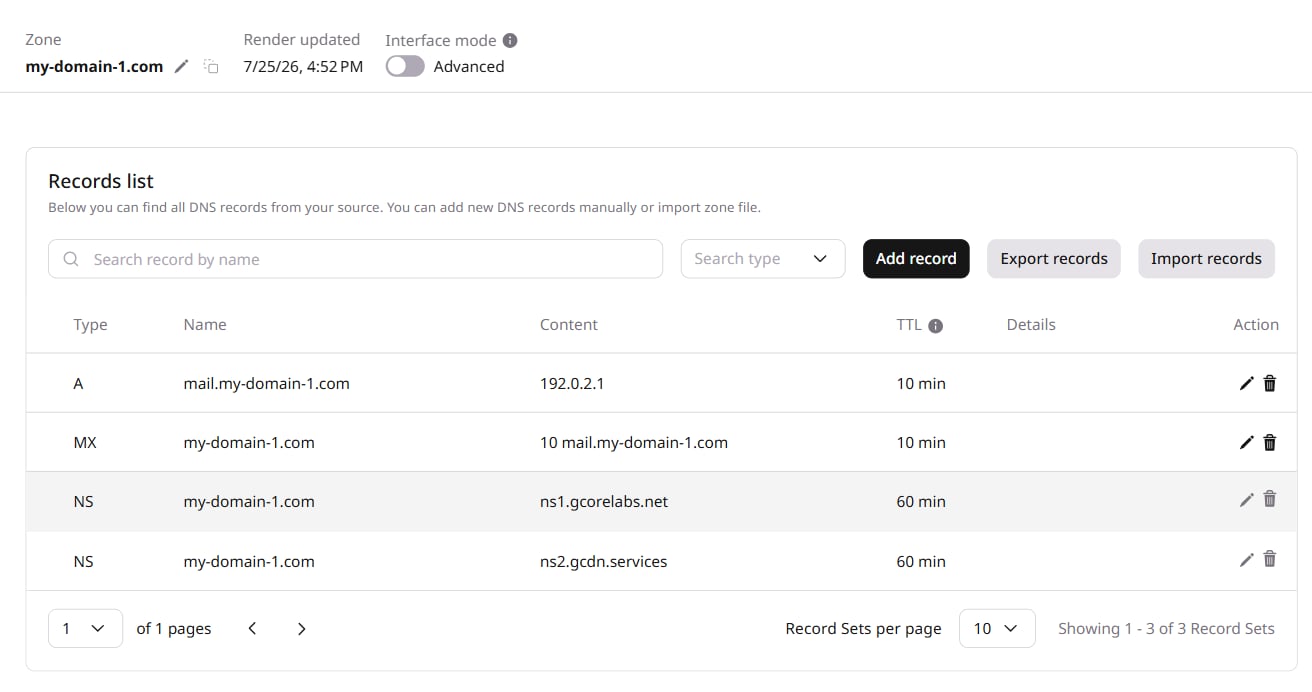
An MX record binds a domain to the mail server. Without an MX record, incoming mail will not work. It is recommended to have more than one mail server so that the second one acts as a backup if the first one fails. For a domainsample-test.com with a mail server at mail.sample-test.com, the record looks like this:
Step 3. Set up a PTR record
A PTR record, or reverse DNS record, links an IP address to a domain name to help verify server authenticity. The reverse DNS guide covers the full configuration. PTR records are provisioned by the hosting provider that owns the IP address. Contact the provider to create a reverse DNS zone (RDNS). For a mail server at192.0.2.1, the PTR record looks like this:
Step 4. Set up SPF (TXT)
An SPF (Sender Policy Framework) record defines which IP addresses are allowed to send mail from a domain. It is added as a TXT record in DNS and helps prevent spam from being sent. An example SPF record forsample-test.com is:
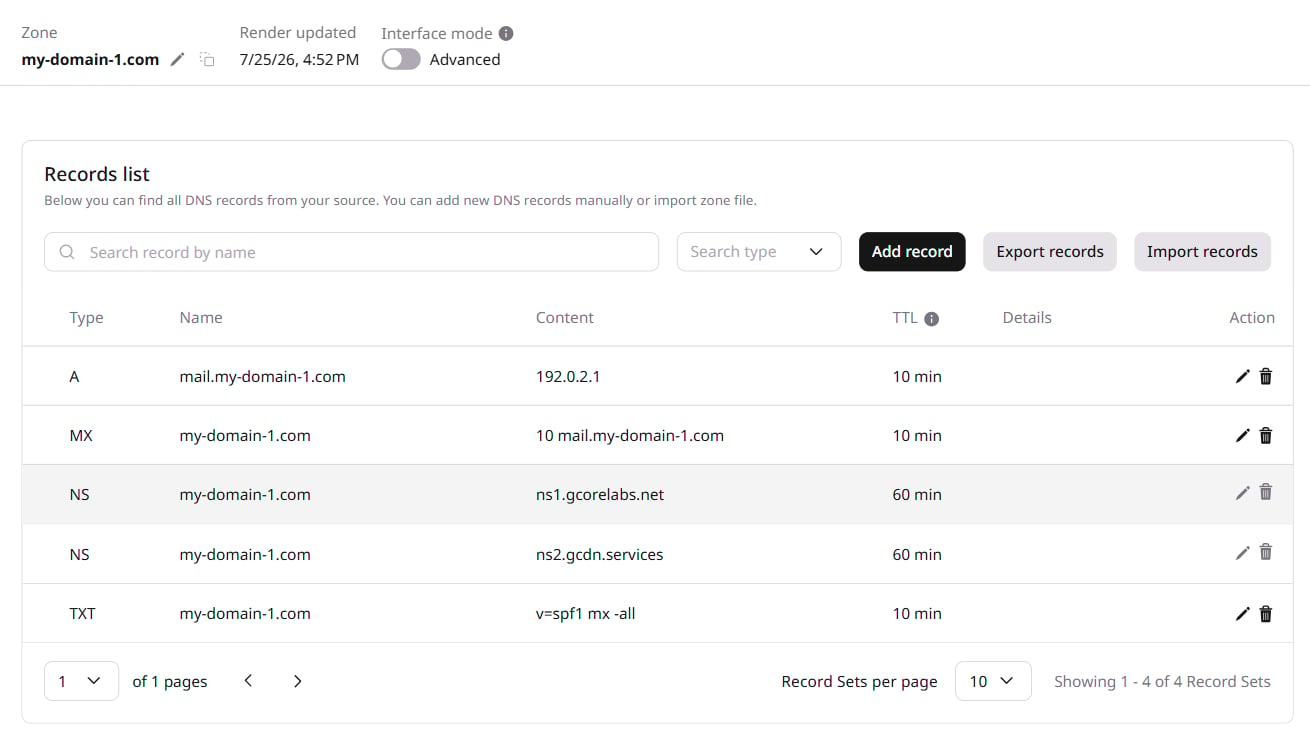
sample-test.com, i.e. mail.sample-test.com (with the IP 192.0.2.1,) are allowed to send mail on behalf of the domain. -all means all other traffic should be considered spam.
Step 5. Set up a DKIM record
A DKIM record (DomainKeys Identified Mail) adds a digital signature to outgoing messages, allowing recipients to verify that the mail came from the listed server. A DKIM record requires adjustments to the mail server configuration, including generating a public/private key pair for signing and verification. The EasyDMARC and DMARCLY key generators automate this process. Once the key pair is generated, the public key is published as a TXT record under a selector subdomain. For a selector namedselector1 on sample-test.com, the record looks like this:
p= field contains the base64-encoded public key generated for the domain.
Step 6. Set up a DMARC policy (TXT)
A DMARC (Domain-based Message Authentication, Reporting, and Conformance) record defines how to handle emails that fail SPF and DKIM checks. This helps minimize harm from spam and security vulnerabilities. When an email is received, the recipient’s mail server checks the sending domain’s SPF and DKIM records. If the records pass the checks, the email is considered legitimate. If either or both checks fail, the DMARC policy is examined. The DMARC policy instructs the recipient’s mail server on how to handle failed authentication emails. The policy can be set to none (no action taken), quarantine (mark as spam or place in a separate folder), or reject (block the email). The following record sets the policy toquarantine and configures report recipients:
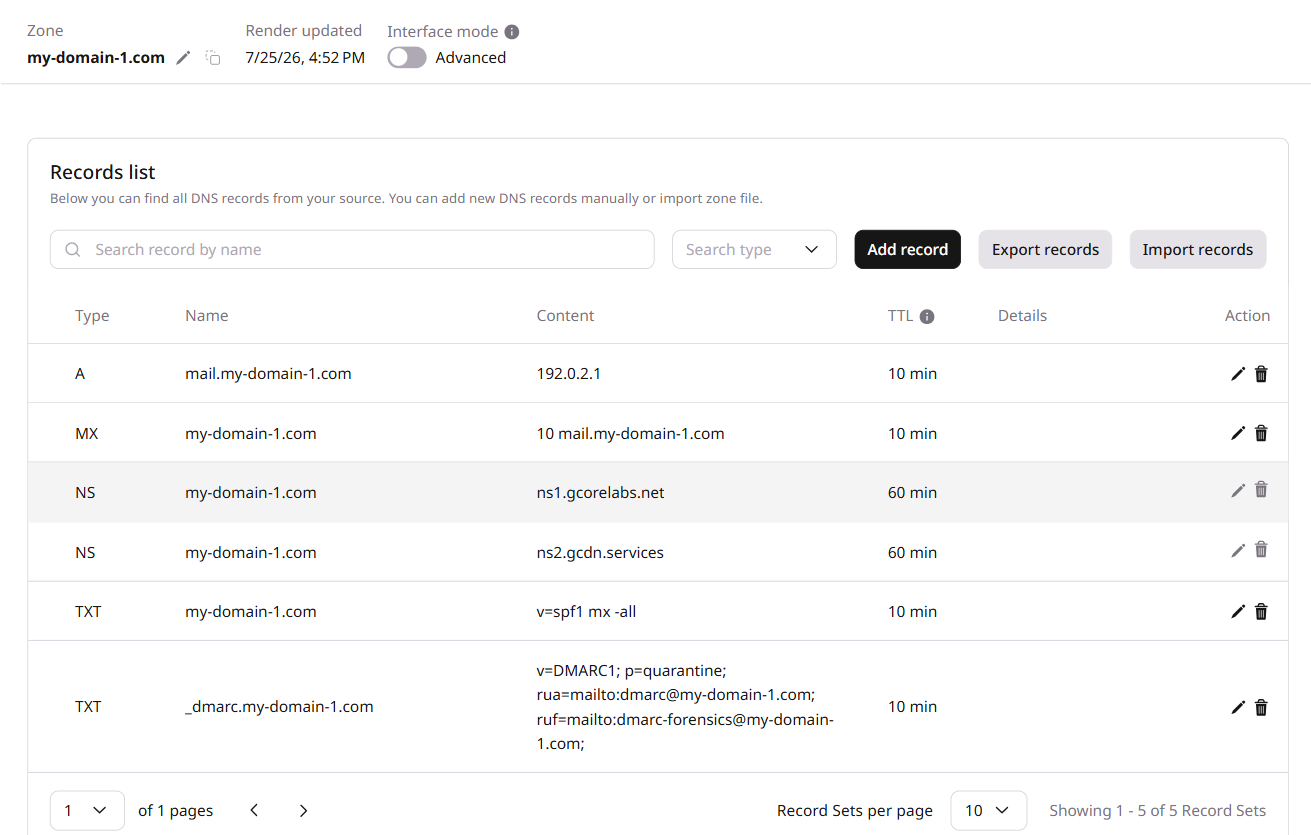
quarantine any emails that fail authentication. The rua parameter specifies the email address where aggregate reports will be sent, while the ruf parameter specifies the email address where forensic (detailed) reports will be sent.