Create a new pool in a cluster
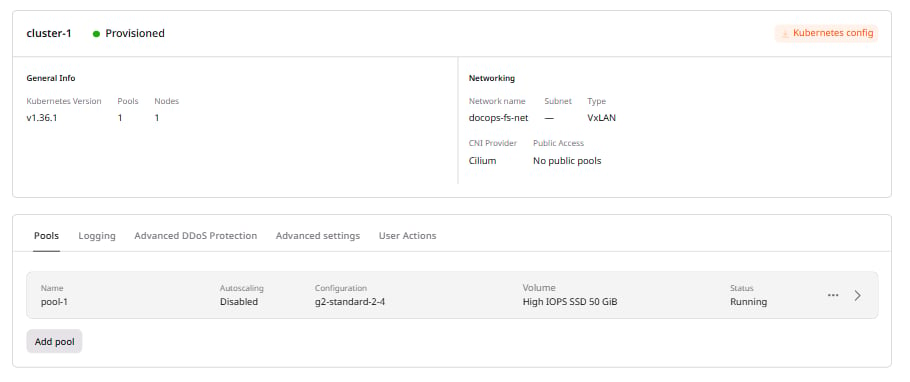
A pool can be created at cluster creation or added to an existing cluster in the cluster settings. The following steps describe adding a pool to an existing cluster: 1. In the Gcore Customer Portal, navigate to Cloud > Managed Kubernetes. 2. Find the required cluster and click its name to open the settings.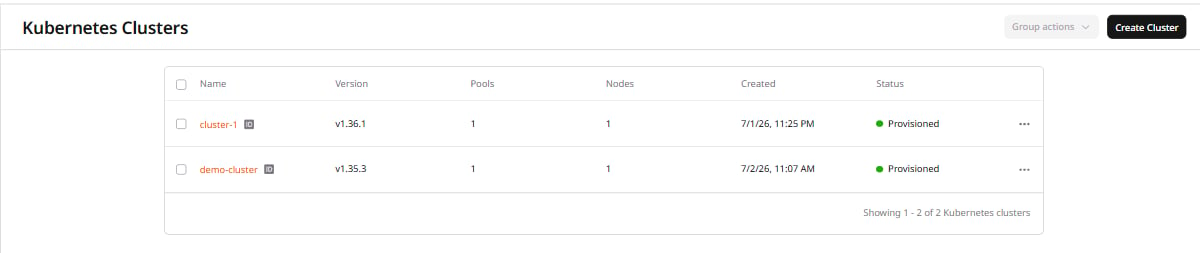
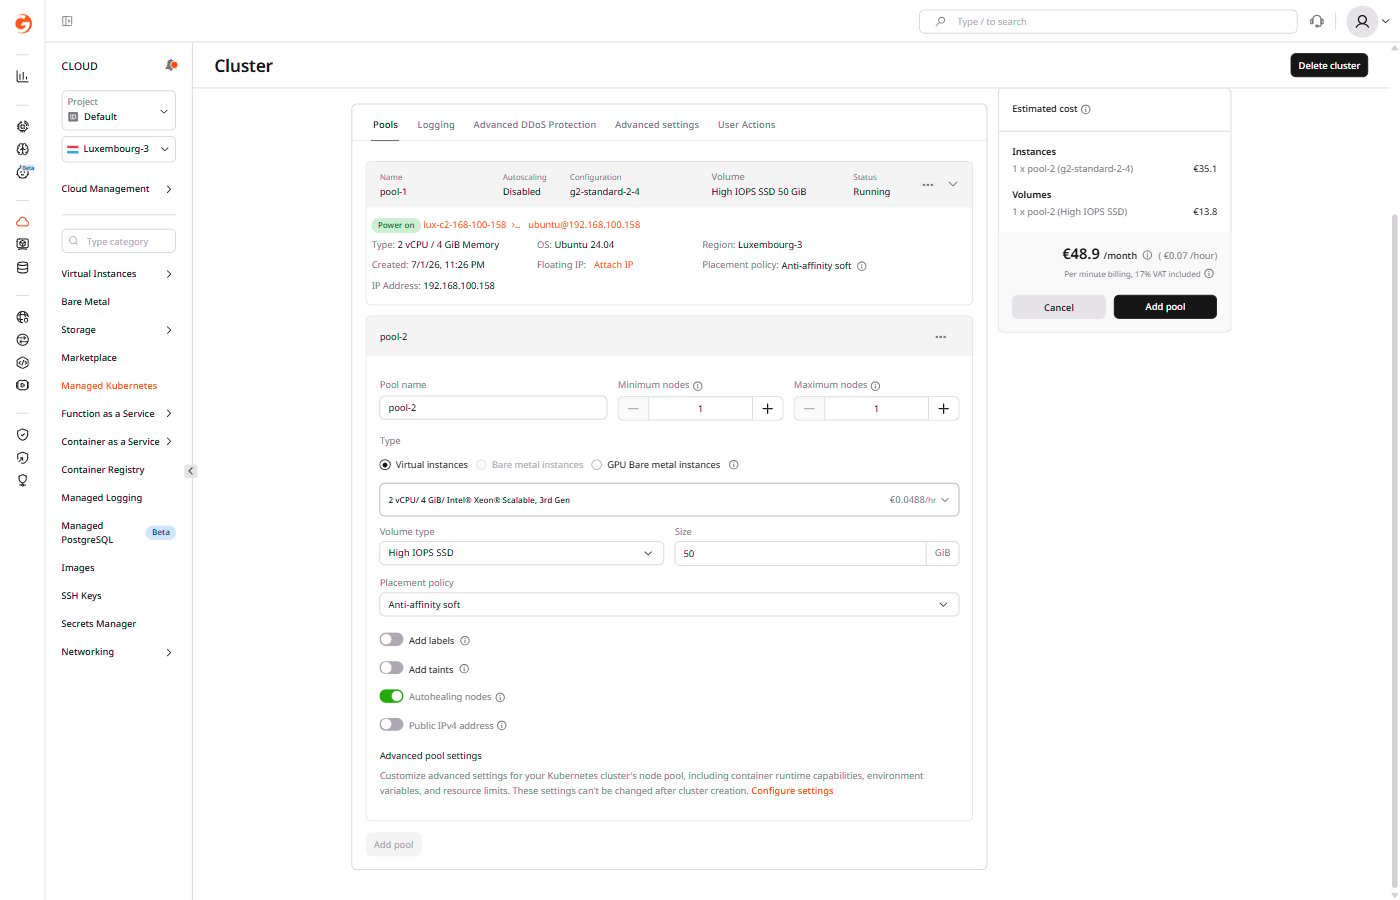
- Enter the pool name.
- Set the minimum nodes and maximum nodes for autoscaling. Autoscaling regulates the number of nodes within the specified limits by removing unnecessary nodes during low load and deploying new ones during high loads.
- Select the worker node type: Virtual instances (VM), Bare metal instances, or GPU Bare metal instances. For VMs, select a flavor, volume size in GiB, and the volume type.
- Choose the relevant placement policy: affinity, anti-affinity soft, or anti-affinity hard.
-
Adjust the optional settings:
- Add labels: Provide labels with extra information about the pool.
- Add taints: Taints define which pods can be scheduled on nodes. A pool can only be scheduled on a node that has a matching toleration. Applying taints to a pool affects all nodes within that pool.
- Autohealing nodes: Automatically replace failed nodes with working ones.
- Public IPv4 address: Assign a public IPv4 address to the pool. This option cannot be changed after pool creation.
- To configure advanced settings, expand the Advanced pool settings section. Advanced settings cannot be adjusted after pool creation.
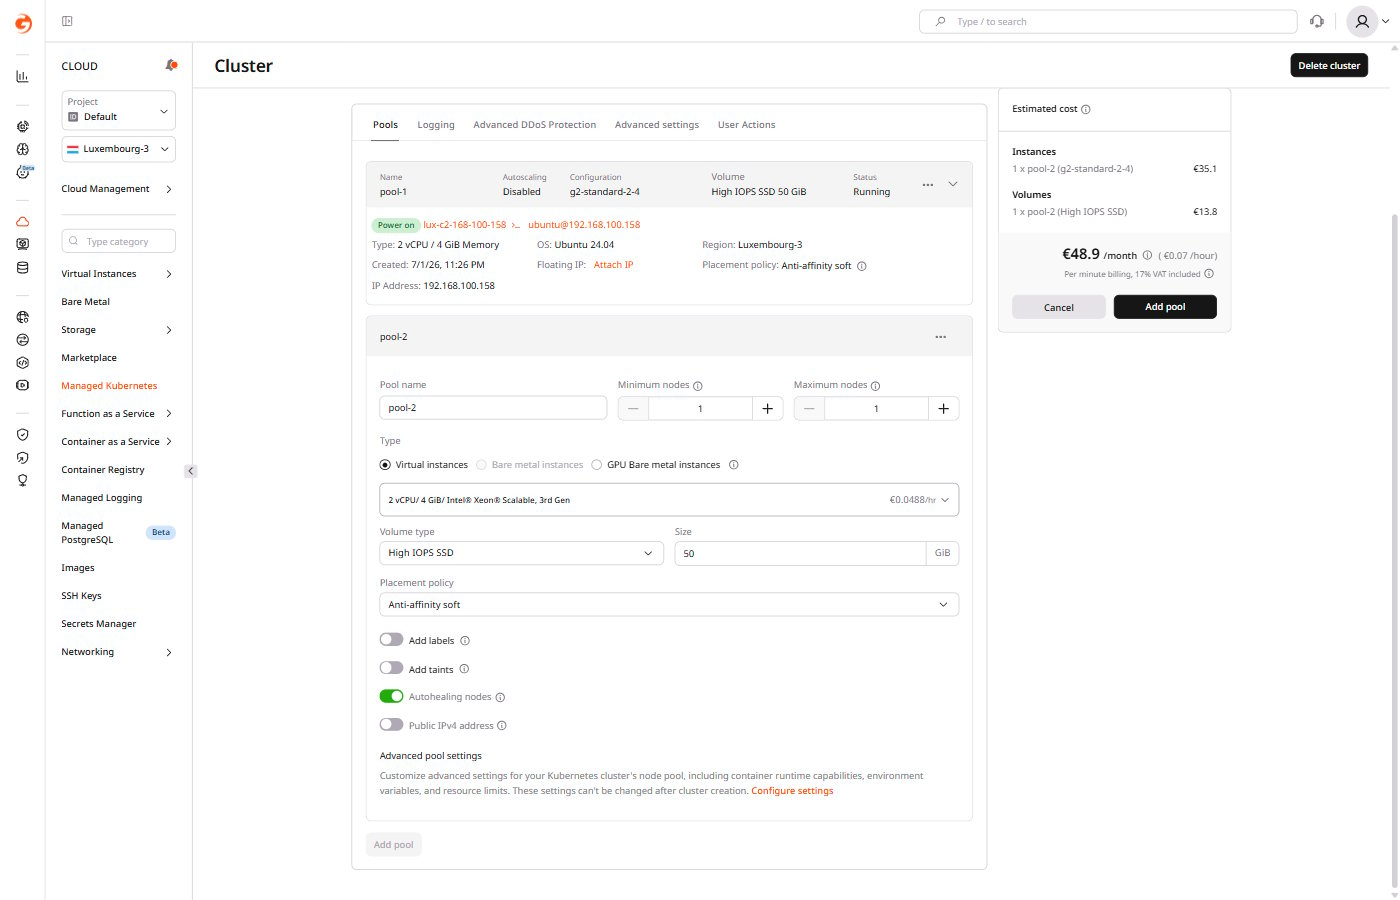
Configure advanced pool settings
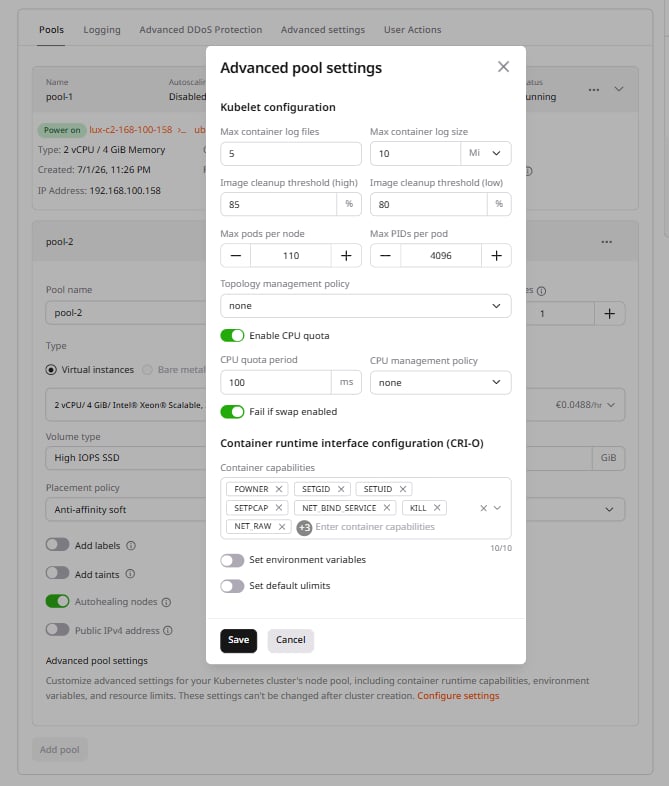
If a cluster contains several pools, different combinations of settings can be configured for those pools. This provides more granular control over cluster subsets and resource usage. A pool with advanced configuration can be added during cluster creation or in the settings of an existing cluster. To do so, find the Advanced pool settings section and click the Configure settings link. The advanced pool settings are divided into two parts: Kubelet configuration and Container runtime interface configuration (CRI-O).Kubelet configuration
Kubelet manages pod scheduling and execution on every node according to the KubeletConfiguration API.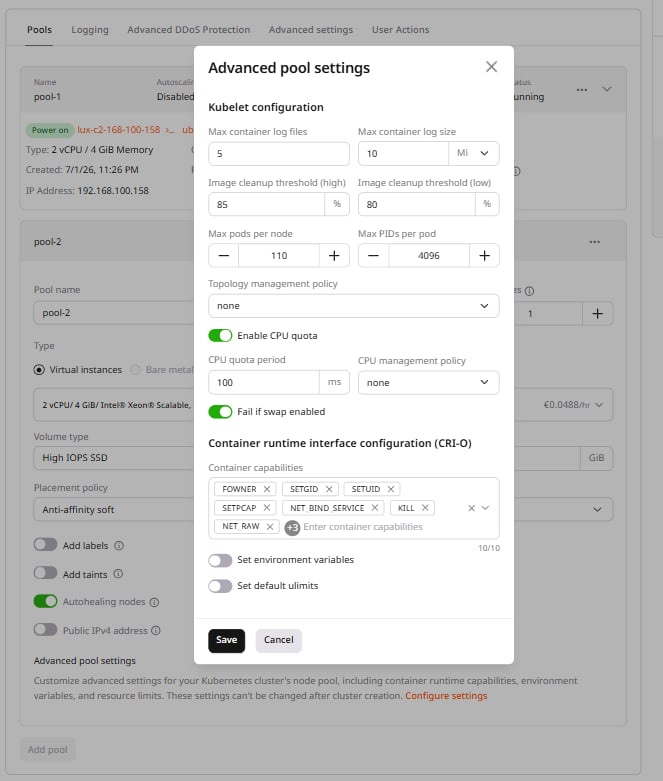
Max container log files
The maximum number of log files retained for a container. Once the limit is reached, the system automatically deletes the oldest log files to free up space for new ones.Max container log size
The maximum size a log file can reach before it is rotated.Image cleanup threshold (high)
When disk usage exceeds the threshold, Kubelet starts deleting unused images until the percentage drops below the low cleanup threshold.Image cleanup threshold (low)
When this threshold is reached, Kubelet stops deleting unused images.Max pods per node
The maximum number of pods that can be scheduled on a node to prevent overcommitting of resources.The maximum allowed limit for Max pods per node is 110.
Max PIDs per pod
The maximum number of process IDs (PIDs) that can be used within a pod. This helps to prevent a single pod from exhausting system resources and affecting other pods on the same node.Topology management policy
Determines how Kubelet coordinates the Container Runtime Interface (CRI) to allocate resources:- none (default): No topology arrangement is applied. Use this policy for workloads where performance is not significantly affected by the placement of resources.
- best-effort: Kubelet tries to allocate the pod’s resources from the same NUMA (Non-Uniform Memory Access) node. If that is not possible, the resources are allocated from multiple nodes. Use this policy for workloads that require a balance of performance and flexibility.
- restricted: A pod is only allowed to run on a node if its resources can be allocated on a single NUMA node. Otherwise, the pod will not start on that node. Use this policy for workloads where performance is important and the cost of accessing memory or devices across NUMA nodes might negatively affect efficiency.
- single-numa-node: Kubelet only allows pods with a single NUMA alignment of CPU and device resources. Use this policy when performance is critical and all resources must be as close together as possible.
Enable CPU quota (optional)
Sets limits on the amount of memory and CPU a workload can use. Disable this toggle when running a single application on a node and CPU usage limits are not required.- CPU quota period: The frequency, in milliseconds, at which Kubernetes checks for CPU quota usage. If the allocated CPU quota is exceeded during this interval, Kubernetes throttles CPU resources for the workload.
-
CPU management policy: Defines how CPU resources are allocated and managed for pods.
- none (default): The system has no strategy for allocating CPU resources, which can be less efficient for workloads with frequently changing CPU demands.
- static: Distribution of allocated resources is predefined. Certain pods get dedicated CPU resources, and other pods share the remaining CPU.
Resource reservation for static policy
Resource reservation for static policy
When the static policy is enabled, part of available CPUs and memory resources is reserved for Kubernetes components that run on each node.CPU resource reservation:
- 6% of the first core
- 1% of the next core (up to 2 cores)
- 0.5% of the next 2 cores (up to 4 cores)
- 0.25% of any cores above 4 cores
- 25% of the first 4 GiB of memory
- 20% of the next 4 GiB of memory (up to 8 GiB)
- 10% of the next 8 GiB of memory (up to 16 GiB)
- 6% of the next 112 GiB of memory (up to 128 GiB)
- 2% of any memory above 128 GiB
Fail if swap enabled
Determines whether Kubelet should start if the Linux kernel swap space is enabled on the host machine.Container runtime interface configuration
Adjust container runtime settings (CRI-O) to specify how containers are executed and managed within the Kubernetes environment.