

1
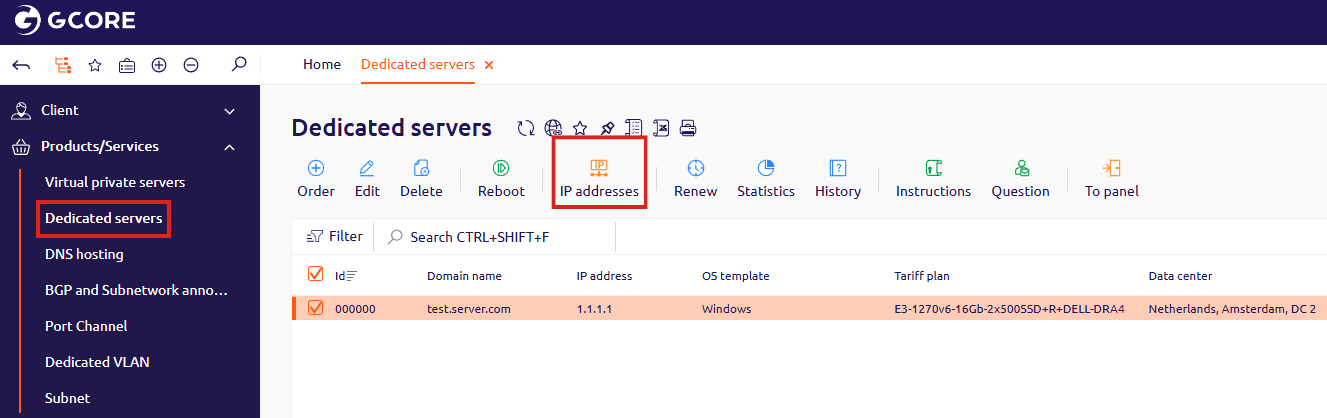
In the Gcore Hosting control panel, open the Virtual private servers or Dedicated servers tab
2
Select the checkbox next to the server
3
View the IP addresses and note the netmask
Click IP addresses in the toolbar. Note the IP address and its netmask — these are required for the configuration.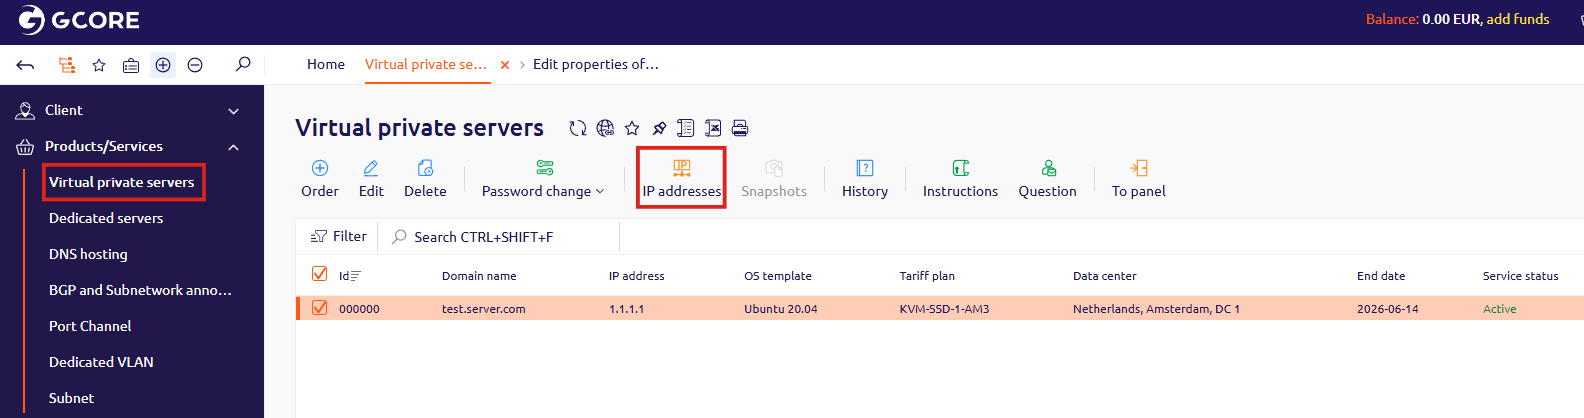
4
Configure the IP address in the OS
Select the operating system and follow the steps.
- Debian and Ubuntu
- CentOS
Edit the network interfaces file to add the IP address.For IPv6 (optional):Replace
- Open
/etc/network/interfaces. - Add the configuration.
N with the sequential index of the additional IP address (starting at 0 for the first), X.X.X.X with the IP address, and 255.255.255.255 with the actual netmask.- Save the file.
- Restart networking: run
systemctl restart networking.
ip addr show to verify the new address appears on the interface.